
When is the last time I uploaded music tutorial? It’s been a long time ago, I think.
What can I do? I’m too busy at college, and last tutorial sounds more like college notebook instead of tutorial 
We’re going to talk about graceful patch switching with Ableton.I can’t even translate that to Indonesian The point is, graceful patch switching is moving between VST that is fast, natural, without loading (hopefully) and beautiful. Graceful itself means anggun in Indonesian.

I hope this tutorial can be useful for Ableton user, especially at church. We at church can play a song that we never prepared, and should play live. And if your ableton is sequencer only, you’ll be messed up.
I hope after this tutorial, this is your way to prepare a project.
First, open the Ableton Live.
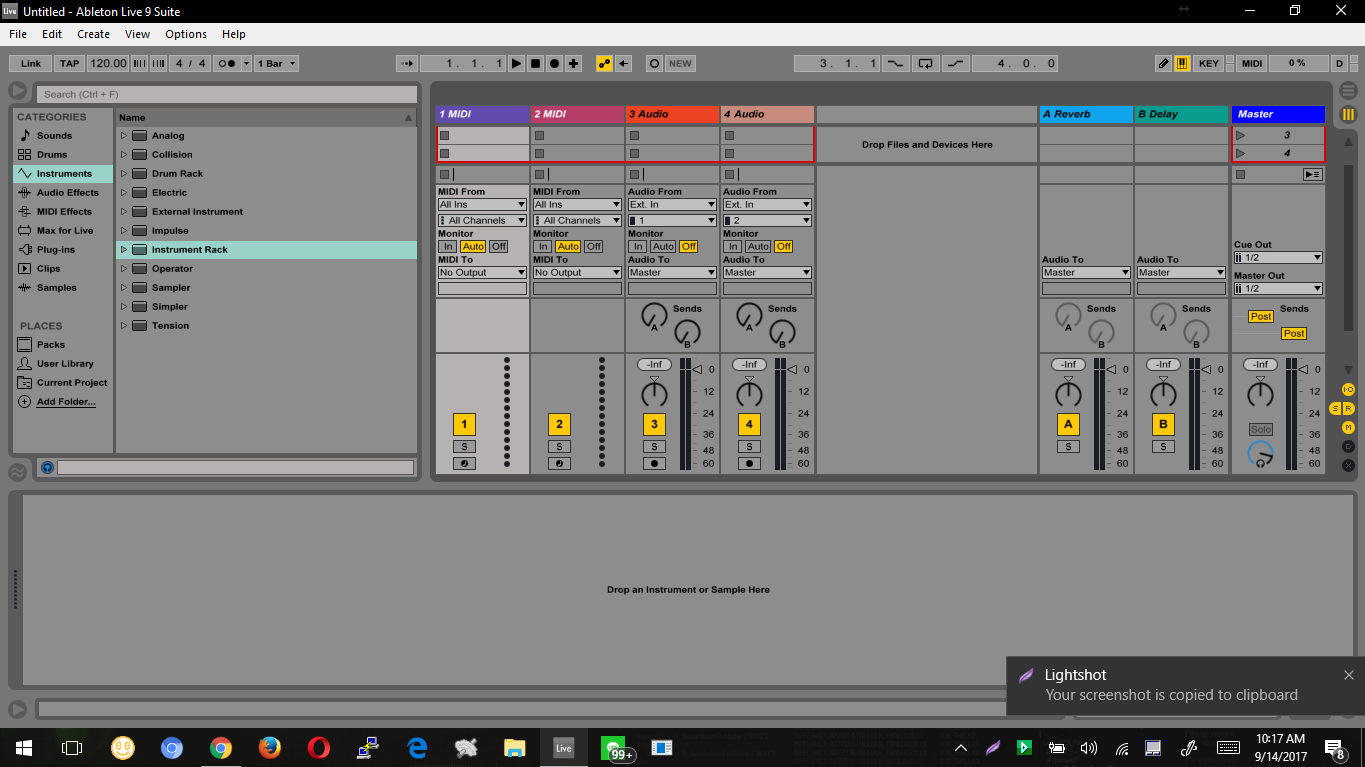
We got usual track. Now delete all the Audio track.
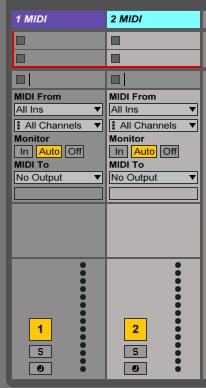
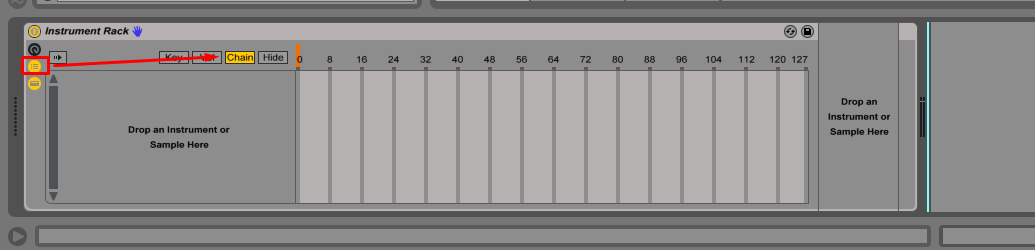
We are going to make Track 1 as piano selector. Put Instrument Rack in it.
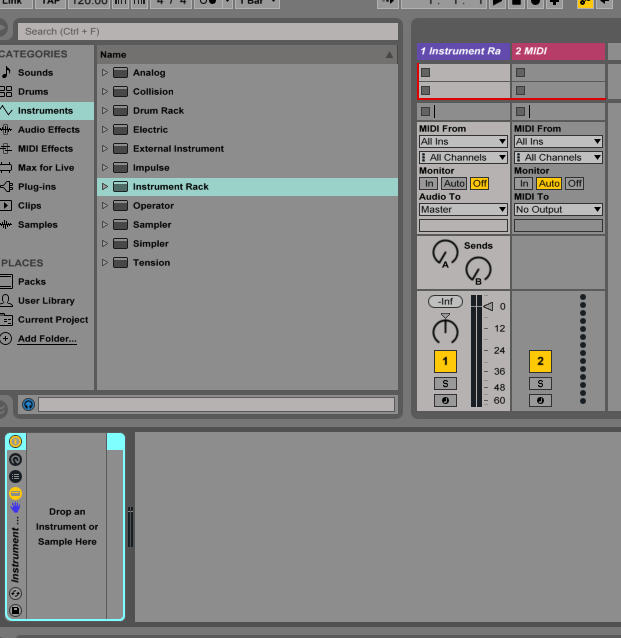
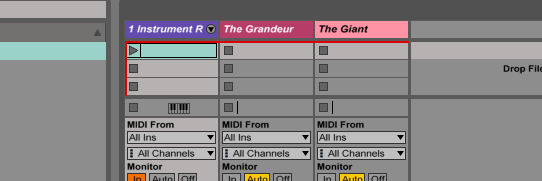
… Then put your piano at track 2. Add more as needed. In this example, I added The Grandeur and The Giant.
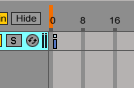
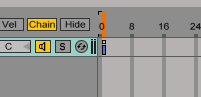
Now, go back to track 1. Click the menu, then open Chain.
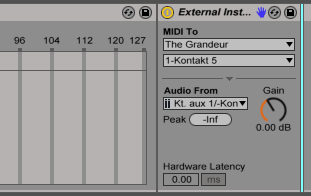
Then, open External Instruments. On MIDI To, choose to The Grandeur.
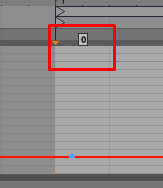
Notice on the chain, there is a small line at point 0. That is, The Grandeur will sound when the value chain is 0. And also there orange color point, which means the chain is now have value 0. If you play the keyboard now then The Grandeur should make a sound.
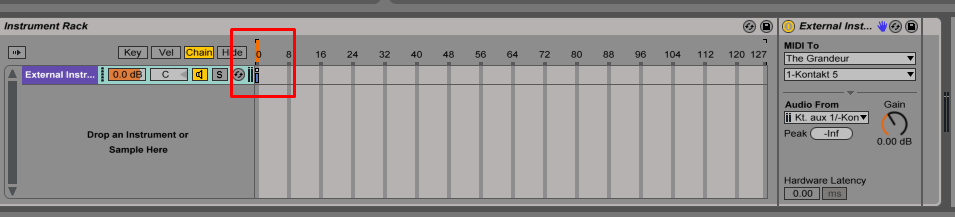
This is not good, ALWAYS make the value 0 as off. You can drag the blue line to value 1.
Now, The Grandeur should not make any sound. Try to move the chain selector to 1.
Now it should make sound. Next, we will put The Giant into chain number 2.
The same way, add new external instruments, point to The Giant, then drag its chain to number 2.
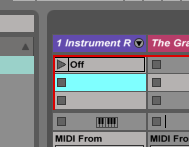
Final result :
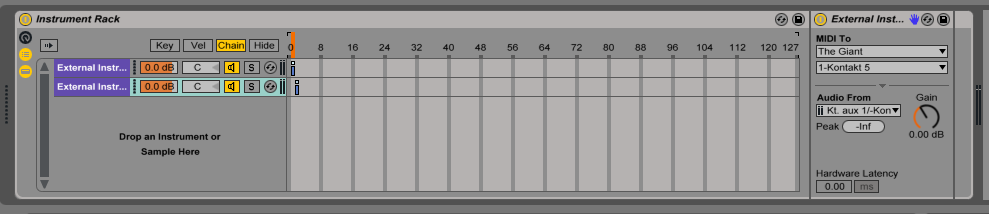
The Giant will sound if the chain selector is moved to number 2. In the picture above, chain selector is on The Grandeur. Note on and off will still be sent in the correct place, so if you sustain a note on The Grandeur, then you move to The Giant then sustain off, The Grandeur will still fade naturally.
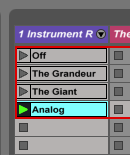
Want to add more instruments? You can. Chain Selector can have value up to 127 (according to MIDI value), and even if it’s exhausted … Just add a new MIDI track.
And then new problems arise if you use ableton instruments (not VST).
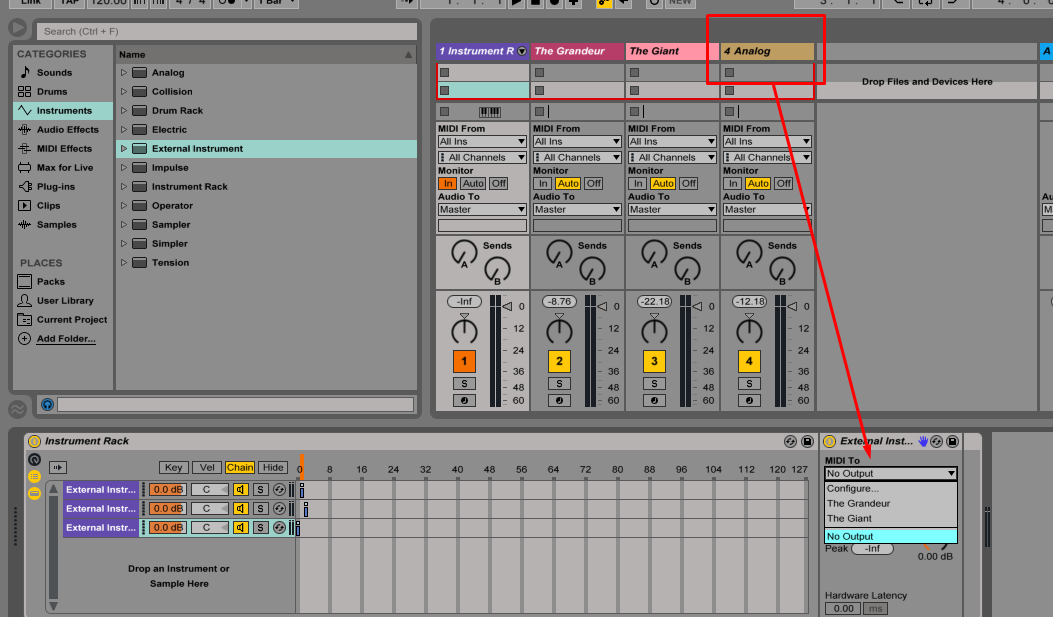
Note that Analog does not appear on External Instruments. The solution is, do not use External Instruments. Just put the Analog directly on Instrument Rack.
Additional info from Kevaz L. Jones at Ableton Indonesia User Group :
External Instruments can only be routed to multitimbral instruments, for example, Kontakt. Another plugin that can’t be used for external instruments : MASSIVE. The solution is, don’t use External Instruments.
Multitimbral itself, according to SoundOnSound, means a instrument that can play multiple sound at once, and each sound can be addressed on separate MIDI channel.

This does not mean to be the solution for everything. Now you can not use Send effects, because if you use Send, all plugins that didn’t use external instruments will be sent. The solution, use the effect that has the ability wet / dry signal. But not all effects have that feature.
The purpose of using External Instruments here is, to increase the flexibility effect and also to reduce memory. One instance of the kontakt uses 80mb, and in fact The Grandeur and The Giant can be merged in one instance. But, to separate 2 kontakt instruments in 1 plugin into 2 track mixer, is not too easy. We’ll talk about that later in other post.
Now, how do you move patch very fast?
It will be really helpful if you got LaunchPad, even the cheapest one.
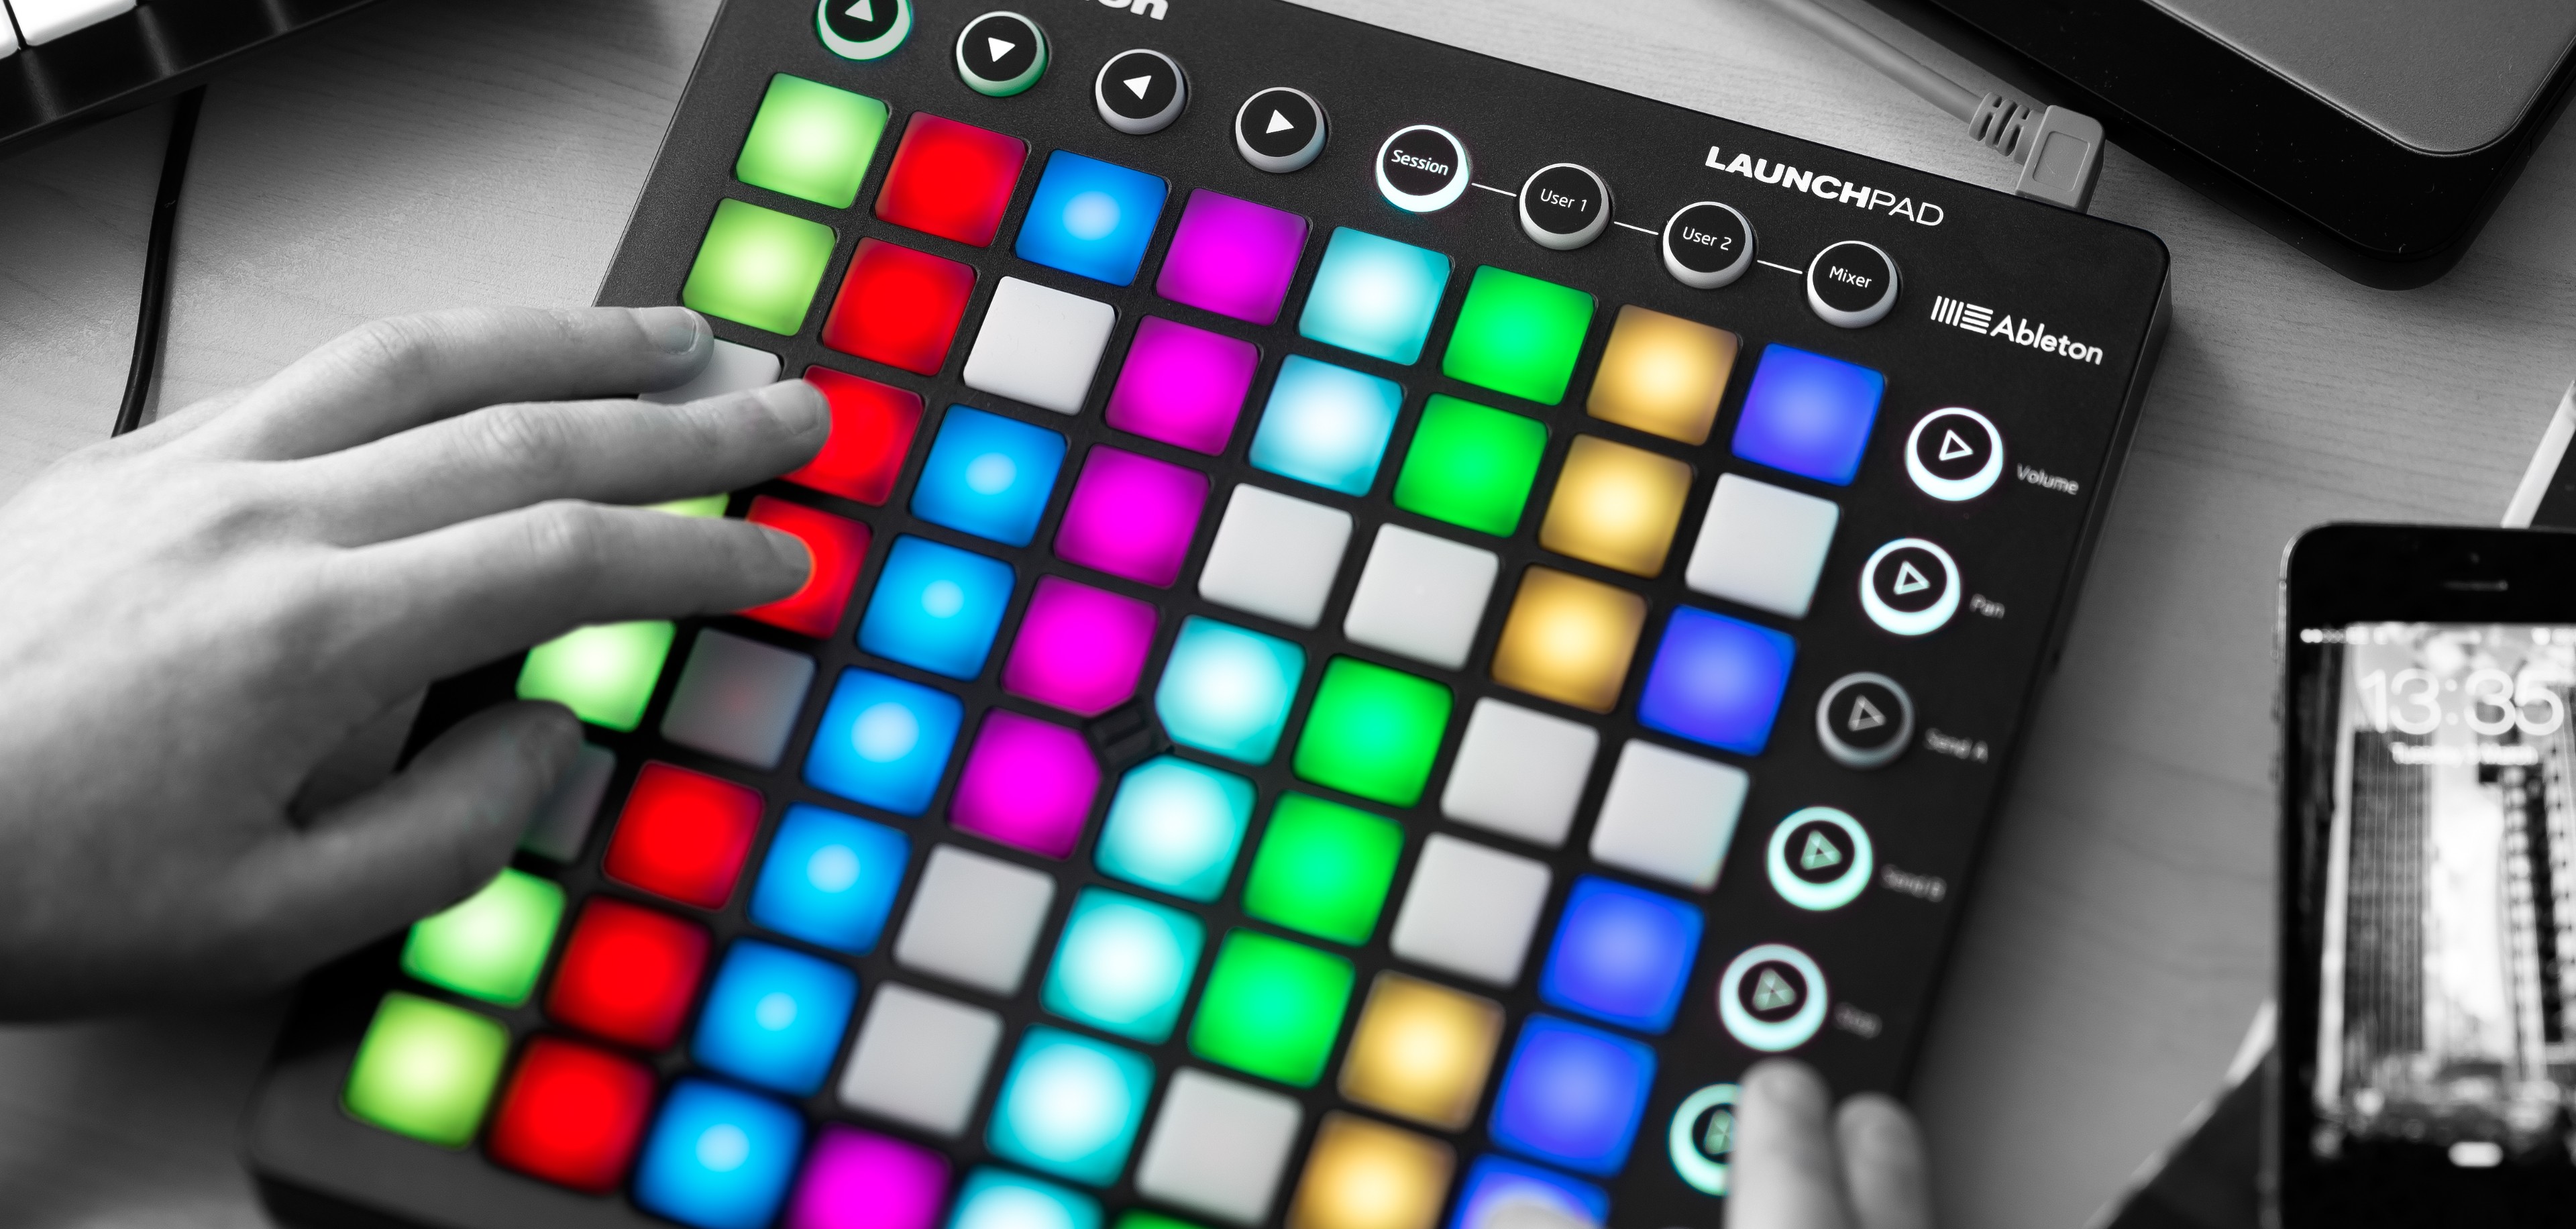
This is what launchpad is made for. Not for kaskobi.
(Seriously, help me buy Launchpad. I’m poor, even I used educational license for Live 9 Suite, that is for student. I even buy it used. )
Stop being jealous.
Back to ableton, double click on one scene to make new scene.
Now I’ve made new scene!
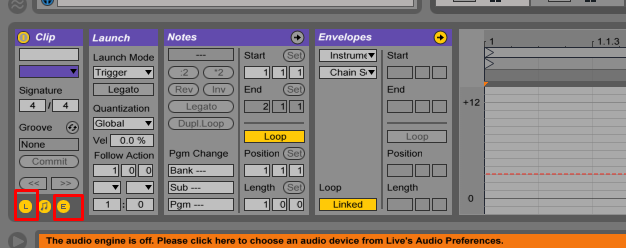
Open menu Launch and Envelope at the bottom.
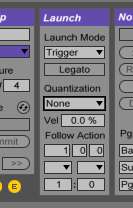
Look at Launch -> Quantization.
None means clip is launched immediately after clicked.
Global usually means clip will be launched at start of every bar.
The rest, depends on the beat. We’re making patch switcher, we gonna choose “None” (except if you’re building a sequenced patch switching, it’s a different story)
Go to Envelopes, choose Instrument Rack and Chain Selector.
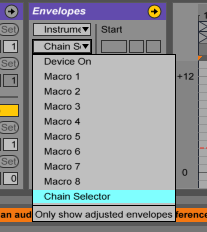
Click on the red line to move the value. For example, 0 make all instruments silenced.
You will always have the current value, so you don’t have to estimate.
Go back to clip launcher, click clip, Right click then Rename. Rename it to Off.
This clip can copy paste, then you can change its chain value. Here’s the end result.
Once pressed, the patch will change instantly without waiting.
You can also create rack instruments again for others, such as Rhodes and FM E Piano specially. Or for Strings and Brass. Or whatever, there’s no limit.
If you have Launchpad, be thankful! Just plug it in, then the patch switching can be done with Launchpad! If you are poor like me, there is another way.
- You can do computer keyboard mapping
- You can do MIDI mapping
First, the computer keyboard mapping for the really poor ones. Click Key at the top right corner of Ableton.
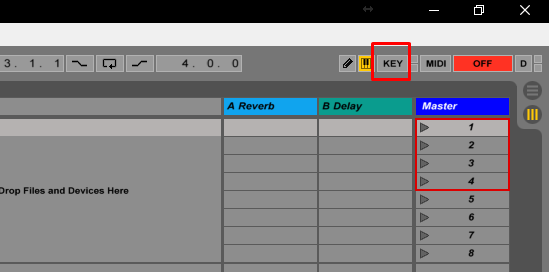
Then, click on one of the clips, then press any key on the keyboard.
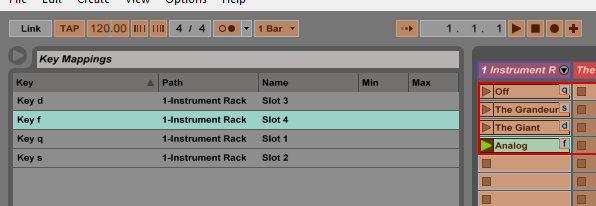
Examples of the results are as follows. Press Q, then keys will turn off. Press S, then The Grandeur will sound, and so on.
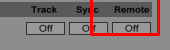
MIDI mapping is similar. Use a cheap MIDI controller, then enable Remote on preferences.
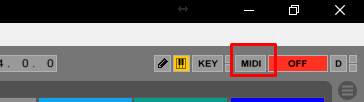
The way mappingnya was similar. Instead of clicking KEY, now click MIDI next to it.
Then it will appear like this.
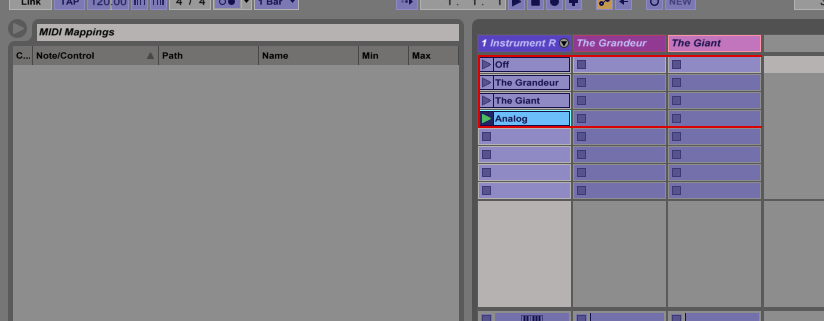
Click on one of the clips, then press the button on the MIDI controller. After that, the MIDI clip can be called with that button.
Then, for MIDI effect placement. Create new instruments on Instrument Rack, then add MIDI effect in front of it. And to put Audio effect, NEVER put Audio effect directly outside instrument rack! Put the Audio effect after the instrument. Which means if you use External Instruments, put it after VST.
That’s all. Thank you for reading.
Special thanks for Aaron Ott at YouTube
https://www.youtube.com/watch?v=YQKSaUs6FFA&t=1022s